|
|
|
|
|
|
|
|
|
|
|
|
|
|
|
|
|
|
|
|
|
|
|
|
|
|
|
|
|
|
|
|
|
|
|
|
 |
 |
|
|
|
 |
|
|
|
|
|
|
|
|
|
|
|
|
|
|
|
|
 |
|
|
|
|
|
|
|
|
|
|
|
|
|
|
|
|
|
|
|
|
|
|
|
|
|
|
|
|
|
|
| Quicky Angels: |
| With a templet from the Carnation follow up formula anyone can create sweet little angels to share with others this holiday season. |
| (keep the scoop holder rings what could be simpler). |
|
|
|
|
|
|
|
|
|
|
|
|
|
|
|
|
|
|
|
|
|
|
|
|
|
|
|
|
|
|
|
|
|
|
|
|
|
|
| 1scoop ring, 1 spool of 2 inch ribbon for skirt, 1 of 1 1/2 inch for wings, 2 inch wooden bead for head, paint for head, hair, cord for hanging, pipe cleaner for arms, and something for her to hold, cord or ribbon to hang her with. |
|
|
|
|
|
|
|
|
|
|
|
 |
|
|
|
 |
|
|
|
|
|
|
|
|
|
|
|
|
|
|
|
|
|
| the rounded part at the top is where you will glue your head with that being the top, feed you 2 inch ribbon making loops through the bottom two holes and the center. two loops per hole and three in the center gives nice fullness. feed the 1 1/2 inch ribbon through the top two holes making loops for the wings four per side seems about right. weave the extra wing ribbon through the body portion to fill it in being sure to cover all the base. paint your head and glue it in place. add your hair. feed a pipe cleaner through wing holes for arms cover with 2 inch ribbon strips for sleeves, glue ends together, add ornament in her hands glue in place. wrap cording around her waste glue up her back, and cover with hair. draw her face on with marker, add blush for cheeks. |
|
|
|
|
|
|
 |
|
|
|
|
|
|
|
|
| I used this to make the angel windchimes I sent to Jean for the June exchange. Satin sheen is great for out doors. |
|
|
|
|
|
|
 |
|
|
|
|
|
|
|
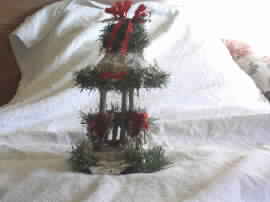
| Christmas gazebo: |
| two litre pop bottles are just the right size for a nice little gazebo. with just a bit of time some scraps, 1/2 cup of rice or beans, spray paint, cardboard, cat tail reed, and some fake snow, oh and your glue gun and your husbands saudering iron.(the most important part) you will have a nice little gazebo for your house. |
|
|
|
|
|
|
|
|
|
|
|
|
|
|
|
|
|
|
|
|
|
|
|
| Christmas Gazebo: |
|
| The credit for this project goes to my daughter who pointed out to me one day that you could make gazebo's out of plastic canvas. Not having plastic canvas we decided to try a pop bottle and see what we came up with. through trial and error we made what you see above. now here's how you can make your own. |
| -poke a hole with a knife for your scissors to fit then cut up to top line cut around it |
| -cut down to bottom line and cut around it also (save the center for your fence around the gazebo) |
| -cut two pieces of cardboard slightly larger than the holes for the bottom add rice or beans, this will give you weight on the bottom. leave the top empty. |
| -with a pencil poke three holes in the top and the bottom |
| use a template to be sure they are spaced evenly top and bottom. cut your reed or small dowel in 6 inch lengths |
| hot glue them in place. |
| -cut 1 1/2 inch strip of center you saved then with saudering iron melt holes spaced like fence boards for fence around gazebo. |
| -gut to fit around posts but leave opening for stairs |
| between two of the posts |
| -spray paint the whole thing with the color of your choice |
| -we used gold and spattered it with red and topped it with the snow |
| -trim around the top, lip, fence, and bottom with fir garland add snow to garland, bows and dried flowers if you like |
| this is an easy project that even kids can do with a little help from mom. remember crafting is for kids too. |
|
|
|
|
|
|
|
|
|
|
|
| Remember |
|
| encourage your children to create and imagine in all that they do, show intrest in their ideas and support them always. |
|
|
|
|
|
|
|
|
|
|
|
|
|
|
|
|
|
|
|
|
| We'd love to here your comments and suggestions |
| rodcross@telusplanet.net |
|
|
|
|
|
|
|
|
|
|
|
|
|
|
|
|
|
|
|
|
|
|
|
 |
|
|
|
|
|
|
|
|
|
|
|
|
|
|
|
|
|
|
|
|
|
|
|
|
|
|
|
|
|
|
 |
|
|
|
|
|
|
|
|
|
|
|
|
|
|
|
|
|
|
|
|
